
Vancouver DataJam Workshop Part 3: Let’s Git Our First Repo Started
This workshop is part of the Vancouver DataJam 2021 event. It will equip participants with the basics of Git, a version control software, and how to collaborate with others on GitHub.
There are three parts:
- Part 1 details installation and set up instructions
- Part 2 introduces the concept of version control, Git, and GitHub
- Part 3 contains hands-on exercises where participants will create a repository in GitHub, make their first commit, and become familiar with other common Git commands
Links to specific sections:
- Create a repository in GitHub
- Clone a repository
- Make the first commit
- Create a branch
- Merge branches with a pull request
Create a repository in GitHub
Let’s start by creating a repository where all the files and folders of your project will be stored.
Step 1
Sign in to your GitHub account on github.com. If you don’t have one yet, follow these instructions to create an account.
Step 2
Click on the green “New” button on the top left to create a new repository.

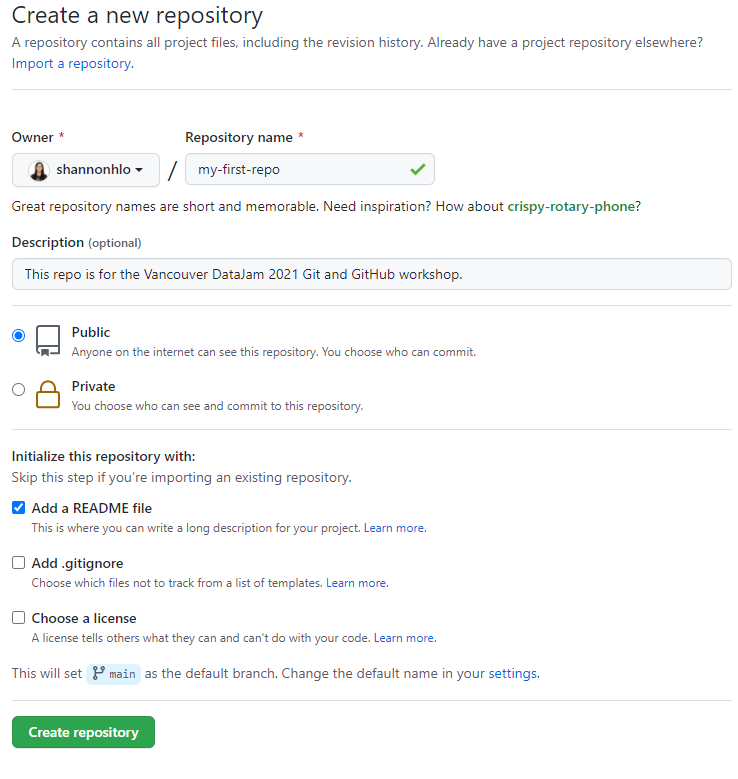
Step 3
Configure repository settings:
- Set the repository name
- Optional - write a short description
- Determine whether this repository should be public or private
- Optional - check “Add a README file” if you want to include add a longer description in the future
- Click the green “Create repository” button
Clone a repository
Now that you have a remote repository on GitHub, we need to make a local copy on your computer so that you can access the content and make changes.
Step 1
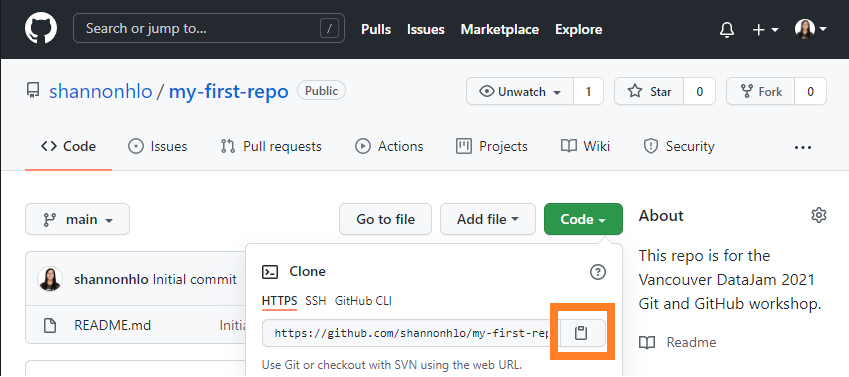
Click the green “Code” button to open Clone options.
Step 2
Click the clipboard icon (orange box) to copy the link
Step 3
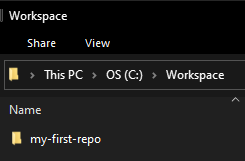
Open Git Bash and use the cd command to navigate to the location where you want to save the local repository (i.e. a copy of your GitHub repo in the form of a folder). If you don’t have Git Bash installed, follow these instructions.
$ cd <insert file path here>
In the example below, I’ve navigated to a folder named “Workspace” in my C drive (C:\Workspace).

Step 4
In Git Bash, type git clone and paste the link you copied during step 2 into the terminal.
$ git clone <remote repository link>
There is now a folder in the specific location (see step 3) with the same name as your GitHub repository (in my case, “my-first-repo”). You’ve created your first local repository!
$ git clone https://github.com/shannonhlo/my-first-repo.git
Step 5
Use the cd command again to point towards the local repository.
$ cd <insert file path of local repository here>
You should now see (main) in blue letters like so:

Make the first commit
Now let’s make our first change by adding a file to the local and remote repositories.
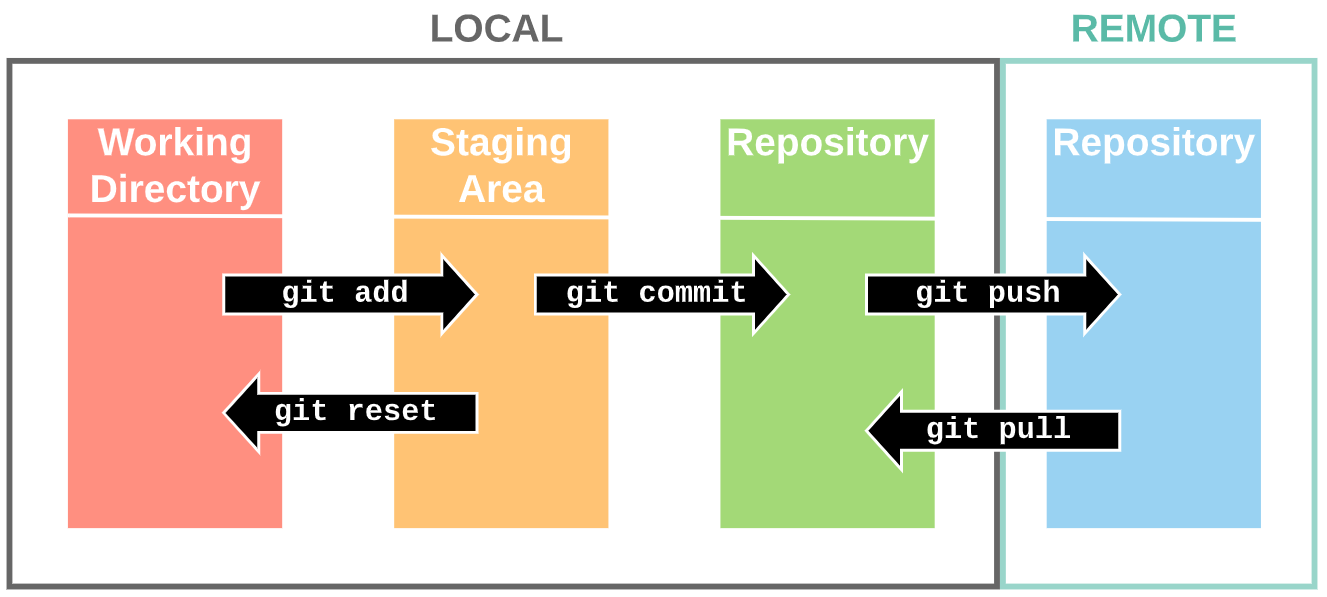
Here is an overview of the process. It’s important to note that there are three areas in a local environment:
- Working directory: Changes in these files aren’t tracked.
- Staging area: Files in this area are going to be in the next commit.
- Local repository: Contains all your commits, or snapshots of changes. Other users cannot access these changes.
- Remote repository: Similar to local repository but other users can access changes in the remote repository.
 |
|---|
| Click here to enlarge the image. Image source |
Step 1
Create a file and save it in your local repository (in my case, the folder named “my-first-repo”). I’ve created a text file named “sample.txt”.
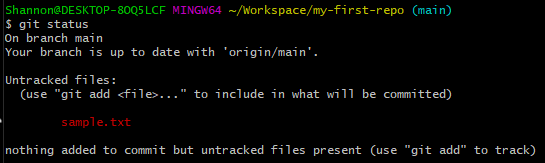
Step 2
In Git Bash, use the git status command to check the state of your local repository and see what changes have been made. This message is telling me that there is a file named sample.txt in the working directory.
$ git status
Step 3
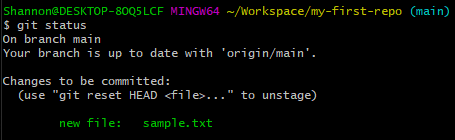
Use git add to add your change to the staging area. This indicates that we want to track the changes in this file.
$ git add <file name>
If we run git status now, the file shows up as green instead of red because it is in the staging area.
Step 4
Use git commit to write a commit message for documentation purposes and create a snapshot of the changes.
$ git commit -m "describe changes here"
Notice that the changes won’t appear in GitHub yet because the changes have not been pushed to the remote repository.
Step 5
Use git push to “upload” the snapshot of changes to the remote repository in GitHub.
$ git push
The changes are now in the GitHub repository where other users can access and build upon your work.
Step 6
If another user makes a change to the remote GitHub repository, you will need to “download” the changes to your computer. This is done using the git pull command.
$ git pull
Create a branch
As mentioned in part 2, branches are copies or versions of the repository that allow users to make changes without affecting other users. Other users’ changes will not affect your branch either.
Create a branch before working on your piece of the project and use it to make changes to avoid overwriting each other’s work.
Step 1
Use the git checkout command to create a new local branch and switch to it. Note that this branch won’t appear on GitHub yet because it is still in the local environment.
$ git checkout -b <new branch name>
In the example below, I’ve created a new branch named dev_shannon. Notice that I have switched over to the new branch because the blue letters display the branch name. This means that any changes I make will be on my own version of the repository.

Step 2
Local branches are pushed to remote repositories using the command below.
$ git push -u origin <new branch name>
The additional options -u origin <branch name> only need to be used the first time a local branch is pushed to a remote repository. Subsequent pushes can just use git push.
Step 3
To switch to another branch (i.e. back to main), we can also use the git checkout command, this time without the -b option.
$ git checkout <branch name>
Merge branches with a pull request
At some point in the project, you’ll want to combine your work with other users. This means that branches will be merged together.
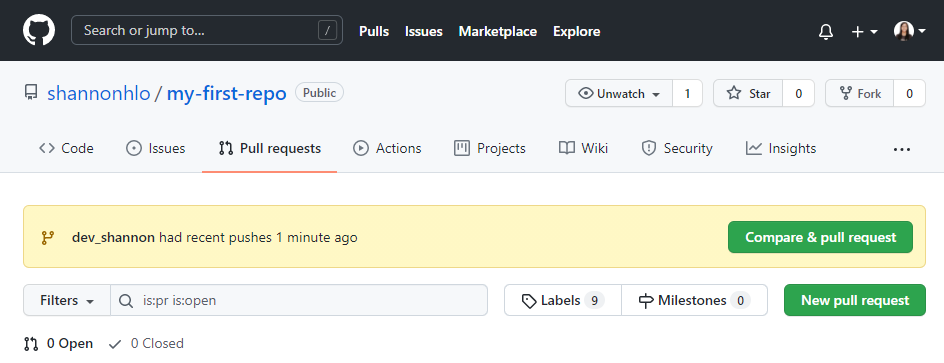
Step 1
A pull request needs to be created in order to merge branches. In GitHub, go to the “Pull requests” tab and click the green “New pull request” button.
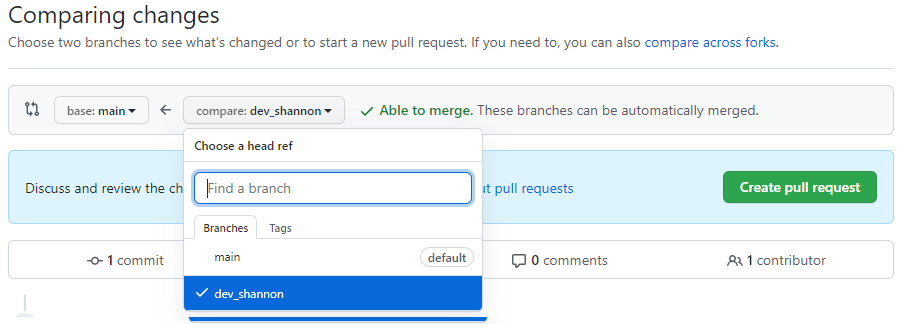
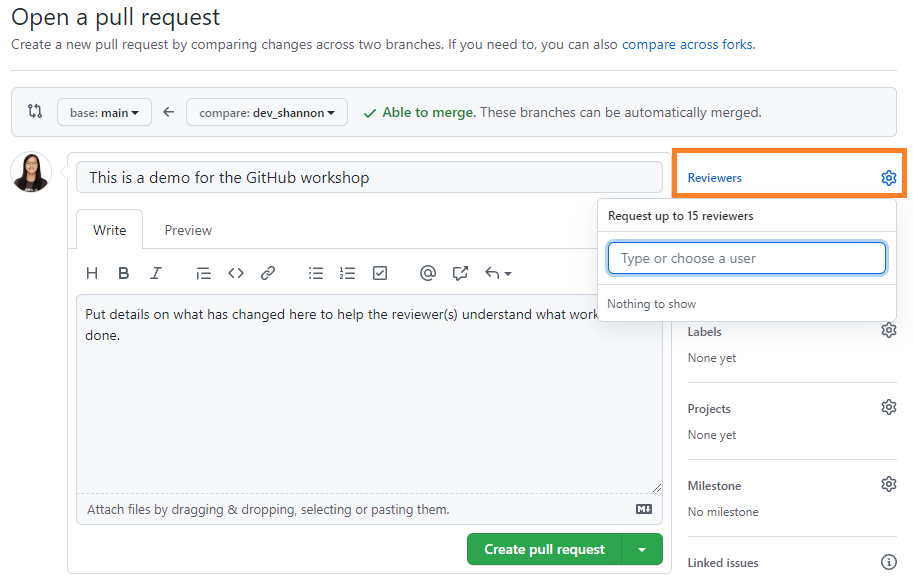
Step 2
Select the two branches you want to merge by opening the drop down. The branch in “compare” will be merged into the “base” branch. Typically, the branch containing changes will be put in “compare”.
Click the green “Create pull request” button.
Step 3
Tag reviewers by clicking on “Reviewers” (orange box). Add an informative title and details in the body to document what changes were made and to help simplify the review process.
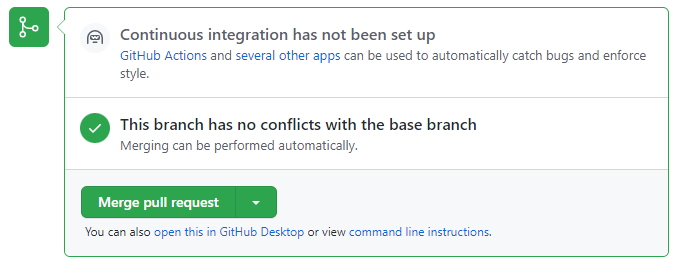
Step 4
Click on the green “Merge pull request” button to merge the two branches.
Useful commands
To summarize, here are the Git commands that were discussed above:
# clone a repository
$ git clone <remote repository link>

# make the first commit
$ git status
$ git add <file name>
$ git commit -m "describe changes here"
$ git push
$ git pull

# create a branch
$ git checkout -b <branch name>
$ git push -u origin <branch name>

# switch to another branch
$ git checkout <branch name>